All my doggs keep asking me how to set up a server. I ask them what kind of server, but they never really know. They want to learn Linux, and I want them to too! So I barked to myself, “Why don’t we write up a post to show them how!” Yea! So here I’ll write up how to install a nice new CentOS 5.5 Linux server.
First, we will need to download the necessary software and burn it to a disc, so go grab yourself a copy of CentOS from one of their mirrors. There are both 32bit (i386) and 64bit (x86_64) versions. Download the best one for your hardware. If you aren’t sure, get the 32bit version. There are both CD and DVD editions available; again get the version that your hardware supports. There is no difference in the CD vs. DVD, except for the size and quantity of discs.
After you have downloaded the .iso image, burn it to a disc with your favorite image burning software. CDBurnerXP is a free disc burning application that works on many different Windows operating systems, and can burn many different types of discs.
Well, now we can actually get started with the installation! We’re going to have to boot from the CD we just created, and your BIOS must be set to boot from CD-ROM. Sometimes this is already configured for you, but you may have to configure it yourself. Configuration is accomplished by entering the BIOS immediately after turning on the computer, and configuring the boot order. To get in to the BIOS we must press the correct key, which can be different for each BIOS brand. Sometimes there will be a message telling you what button to press, other times there isn’t. Most common options are the F1, F10, DEL, and ESC keys. If you aren’t sure, and you don’t see a message telling you what to press immediately after turning on your PC, head over to Google and search for how to enter the BIOS on your specific PC.
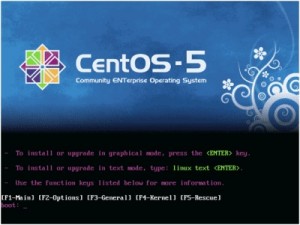
Once we boot from the disc, we will see a message similar to what is below:
Here you can enter any special instructions to be used during boot. We won’t need any here, so just hit enter and wait for the next screen:
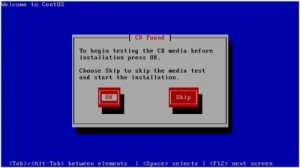
You can test the media here, to ensure that the disc was burned correctly. After testing we will be transported into a magical land of fire hydrants and graphical installers! Ok, maybe no fire hydrants, but a dogg can dream!
The next few screens will ask you to select your language and keyboard layout, then move into setting up the hard disk:
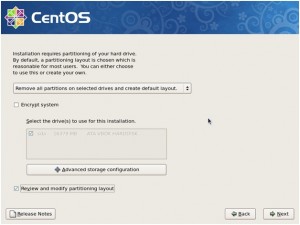
Select the option to “Remove all partitions on selected drives and create default layout” from the drop down menu. Also check the box next to “Remove and modify partitioning layout.”
It is important to know that after this point, we will be erasing everything on the hard drive, so any data on the drive will be lost!
We also need to talk about the disk partitioning structure real quick. We can just choose the default layout, and with larger hard disks or less used servers, that is fine. But that’s not what this dogg is all about! So we are going to create a better layout.
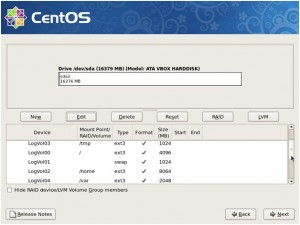
We don’t want a rogue user or runaway log file to take up all our disk space (which can bring our server to a halt), so we’re gonna separate the /home directory (where all users will store their files), the /tmp directory (where temporary files are stored), the /var directory (which contains the log files, among other things), and the / directory (the root directory), which will contain everything else.
Some people will separate the directories even further, creating an additional separate partition specifically for the log files (/var/log), along with some others. Take a look at the image below for a basic idea. If you are lost at this point, just go back to the previous screen and uncheck the box next to “Remove and modify partitioning layout.”
Next we find ourselves at the GRUB boot loader setup. Keep the default options here and continue to the network setup. I like to specify the fully qualified domain name here in the hostname box. You can just specify the hostname, if you don’t have a domain name yet. Leave everything else as default, and continue on to the time zone configuration. Select your time zone, and keep going! Next we will create a root password, which we are going to need later, so don’t forget it! Now we are finally ready to start selecting the software to install!
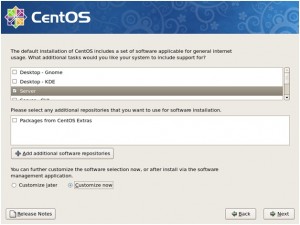
I like to install my servers with a minimum amount of software, and add what is necessary later. This helps keep disk usage low, and avoids installing unnecessary software which can use up resources down the road. Select just the option for the Server configuration, and click next. You can optionally select the “Customize Now” option, and add any additional software you want, along with removing anything you don’t want.
Continue through the remaining menus, and you should be ready to install! After installation you will be prompted to remove your installation disc and reboot. After doing this, you will now have a brand new, fresh & clean, CentOS Linux server! Next time, we’ll cover some initial server security setup, and take a look at what all we can do with our server. But for now, I’m going for a walk!
Hey! Many thanks for making this kind of an insightful article. Actually you could possibly have described those issues the other way around. And yet you brought it a friendly particular twist. Looking foward to visiting your blog more reguarily.